
How to Fit an Isofix Car Seat Safely: An Expert Guide
Bringing your baby home is one of the most exciting milestones in your parenting journey. At Pram Centre, we know that while preparing your nursery is filled with joy, setting up essential safety gear like car seats can sometimes feel daunting. Ensuring your child is secure on every trip starts with a flawless installation.
Knowing how to fit an Isofix car seat correctly gives you complete peace of mind whenever you hit the road. Isofix technology was created to make car seat installation quicker, easier, and far less prone to fitting errors than traditional seat belt methods. Our safety guide walks you through locating your anchor points, securing the connectors, and checking every safety indicator step by step.
TL;DR
Installing an Isofix car seat safely comes down to four key steps:
- Locate: Find the metal anchor loops between the rear seat cushions.
- Click: Push the Isofix connectors onto the loops until both sides click and turn green.
- Support: Extend the support leg firmly to the floor or tighten the top tether strap.
- Verify: Perform a firm wiggle check to ensure under 2.5 cm of total movement.
Content
What is an Isofix Car Seat?
An Isofix car seat uses a standardised fitting system that secures the seat directly to your vehicle’s metal chassis using rigid connectors rather than standard adult seat belts. Designed to eliminate fitting errors, Isofix creates a solid, permanent link between the child seat and the car frame, significantly reducing forward and lateral movement during a collision.
Before diving into the fitting process, it helps to understand why Isofix has become the gold standard across the UK. Before Isofix, research showed that many traditional car seats were installed incorrectly when secured using seat belts alone. Isofix (International Standard Organisation FIX) replaces guesswork with a direct mechanical connection.
Whether you are using a dedicated Isofix base for an infant carrier or an extended rear-facing toddler seat, the mechanism functions on the same core principle: rigid steel connector arms built into the seat or base latch directly onto fixed metal anchor points built into your car.
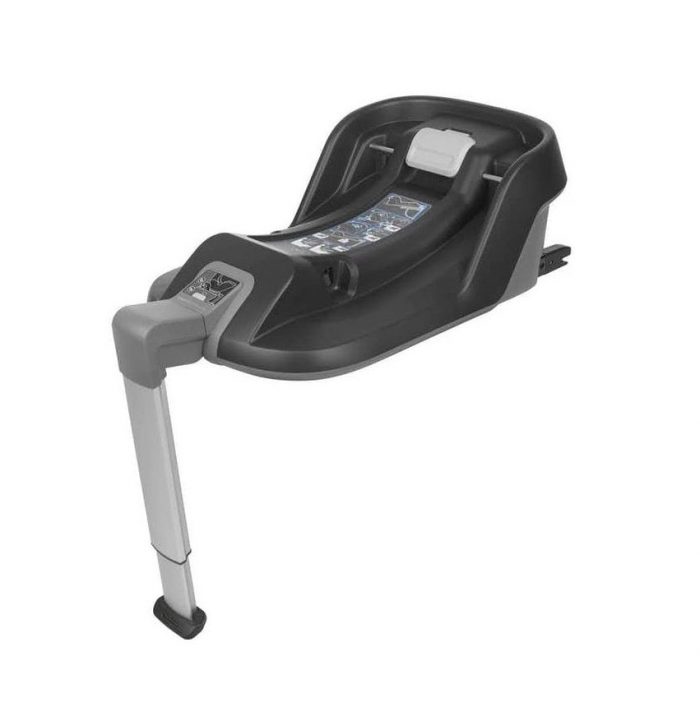
What Does Isofix Look Like in a Car?
Isofix anchor points are small steel bars or loops welded directly to your vehicle frame. You can find them tucked into the crease between the backrest and the bottom seat cushion of the rear passenger seats. They are usually identified by small plastic logos, fabric labels marked “ISOFIX”, or hidden behind flip-up plastic covers.
If you are inspecting your car seats for the first time, you might not immediately spot these metal fixings. Vehicle manufacturers often integrate them discreetly into the upholstery to maintain clean interior aesthetics.
To locate them:
- Slide your hand into the gap where the seat back meets the bottom cushion (known as the seat bight).
- Move your fingers along the gap until you feel two rigid, horizontal steel loops on either side of the seating position.
- Look for visual markers: most modern vehicles built after 2014 feature small round plastic badges or fabric tags on the seat backrest marking the exact position.
Expert Tip: Many car seats and bases come with plastic guide funnels. Snapping these plastic clips onto your vehicle’s metal anchor points widens the gap in the fabric or leather, making it much easier to slide the Isofix arms into place without snagging your car upholstery.
Step-by-Step Isofix Car Seat Installation Guide
Installing an Isofix car seat correctly relies on three key actions: locking the connectors until they click, adjusting the anti-rotation device, and verifying that all visual indicators turn green. Always double-check for excess movement once fitted.
Fitting your Isofix car seat or base correctly takes just a few minutes when following these structured steps:
Step 1: Prepare the Vehicle and Anchor Points
Clear any loose items from the rear seat and ensure your car is parked on flat ground. Locate the Isofix anchor points between the seat cushions. If your seat includes plastic insertion guides, push them onto the metal loops now.
Step 2: Extend the Isofix Connector Arms
On your car seat or base, locate the release mechanism (typically a central pull-handle or side levers) that extends the steel connector arms fully outward. Extending them completely gives you maximum reach and clearance when lining up the base with the seat back.
Step 3: Align and Click into Place
Guide the connector arms toward the metal anchor points. Line up both arms simultaneously and push the seat or base firmly backwards against the vehicle’s seat cushion. You should hear a distinct, reassuring “click” from both sides as the jaws lock around the anchor bars.
Step 4: Check the Visual Colour Indicators
Look closely at the indicator windows on the side of the Isofix arms or release handles. Modern Isofix systems feature colour-coded safety checks:
- Red: The connector is unlocked or improperly latched.
- Green: The connection is secure and fully locked.
Never travel if either indicator displays red. If one side remains red, pull the release button, withdraw the base slightly, and re-engage with firm, direct pressure.
Step 5: Secure the Anti-Rotation Device (Support Leg or Top Tether)
To prevent the car seat from pitching forward in a collision, Isofix requires a third point of stability. This is achieved through either a support leg (footprop) or a top tether strap.
- If using a Support Leg: Unfold the support leg from beneath the base until it extends down to the vehicle floor. Adjust the length until the foot rests flat and firm against the floor pan. The leg’s indicator window will turn green when correct tension is achieved. (Note: Check your vehicle manual if your car has underfloor storage boxes, as these can affect support leg safety).
- If using a Top Tether: Route the tether strap over the top of the rear passenger seat and clip it into the designated Top Tether anchor hook (located on the back of the seat, in the boot floor, or on the roof lining). Pull the webbing tight until the tension indicator turns green.
Step 6: Perform the “Wiggle Check”
Grasp the car seat near the Isofix connection points and test for firmness. A properly installed Isofix seat should move no more than 2.5 centimetres (1 inch) side-to-side or front-to-back. If the seat feels loose, push the base firmly into the vehicle backrest once more until it sits completely flush.
Frequently Asked Questions (FAQs)
Can you install an Isofix car seat in any car?
Most cars manufactured in the UK and Europe after 2006 feature Isofix anchor points, and all cars produced since November 2014 are legally required to have them fitted as standard. However, you should always check your vehicle handbook or use a manufacturer compatibility tool before buying, particularly if your car features underfloor storage compartments in the rear footwells.
What is the difference between a support leg and a top tether?
Both act as vital anti-rotation devices designed to stop the car seat from tipping forward during an impact. A support leg extends downward from the base to brace against the car floor. A top tether is an adjustable fabric strap that hooks into a dedicated anchor point behind the car seat. You must use the specific anti-rotation method required by your seat model.
Why are my Isofix indicators still showing red?
If your indicators show red, the connector jaws have not fully clamped around the metal anchor bar. Pull the base back slightly, ensure the arms are extended evenly, and push backwards with firm, steady pressure until you hear the distinct locking click and see the window change to green.
Do I need a separate base for an infant car seat?
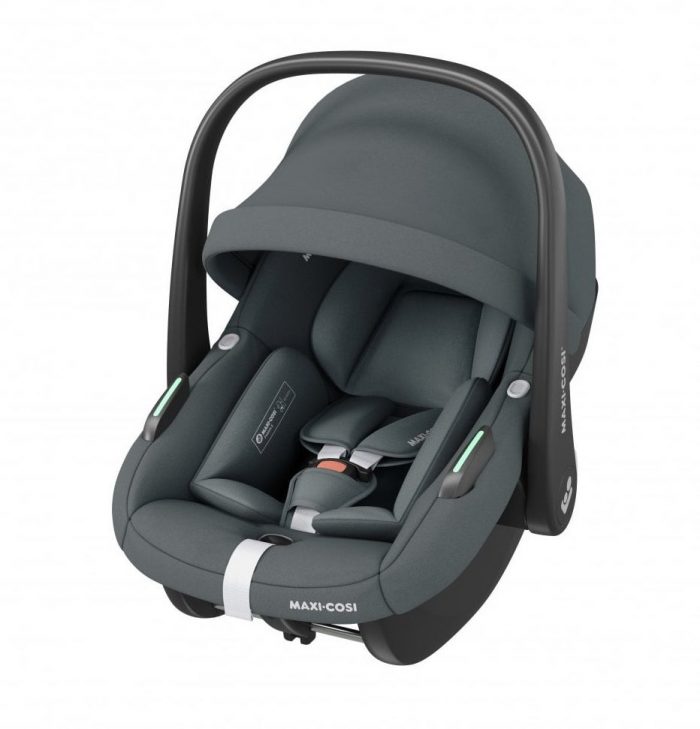
While some infant carriers can be installed using a standard 3-point seat belt, using a dedicated Isofix base adds speed and enhanced safety. The base stays permanently installed in your car, allowing you to click your infant carrier in and out in seconds without re-threading seat belts on every journey.
Isofix Car Seats at Pram Centre
Whether you are stocking up on everyday essentials or designing your dream nursery, the Pram Centre is your ultimate one-stop shop for your new arrival. Combining the UK’s largest display of prams, travel systems, and nursery furniture with our unbeatable best price guarantee, we take the stress out of shopping so you can focus on what matters most.
At Pram Centre, your child’s safety is our top priority. If you ever feel unsure about choosing or fitting the right car seat, our knowledgeable team is always here to offer expert advice and fitting guidance. Explore our complete range of certified Isofix bases today to make every journey safe, easy, and stress-free!
Read Next
Car Seat Safety: What is i-Size?
When to Move Your Baby from Pram to Pushchair: A Complete Guide
Comments are closed here.